
TM 55-8145-202-14
f.
Assembly.
(1) Pull wire through front of container and through conduit sections and couplings.
(2) Screw in conduit (23) to coupling(s) (27) as required.
(3) Screw base (25) into conduit (23).
(4) Screw switch box (26) into fixture base (25).
(5) Raise assembled components to container wall and insert two screws (24) into fixture base (25).
(6) Secure the conduit (23) using the clamps removed during disassembly (22) and screw in using the five
screws (21) previously removed during disassembly.
(7) If necessary, loosen fitting (19) at outside, front of container and pull wiring (20) out as far as is
necessary.
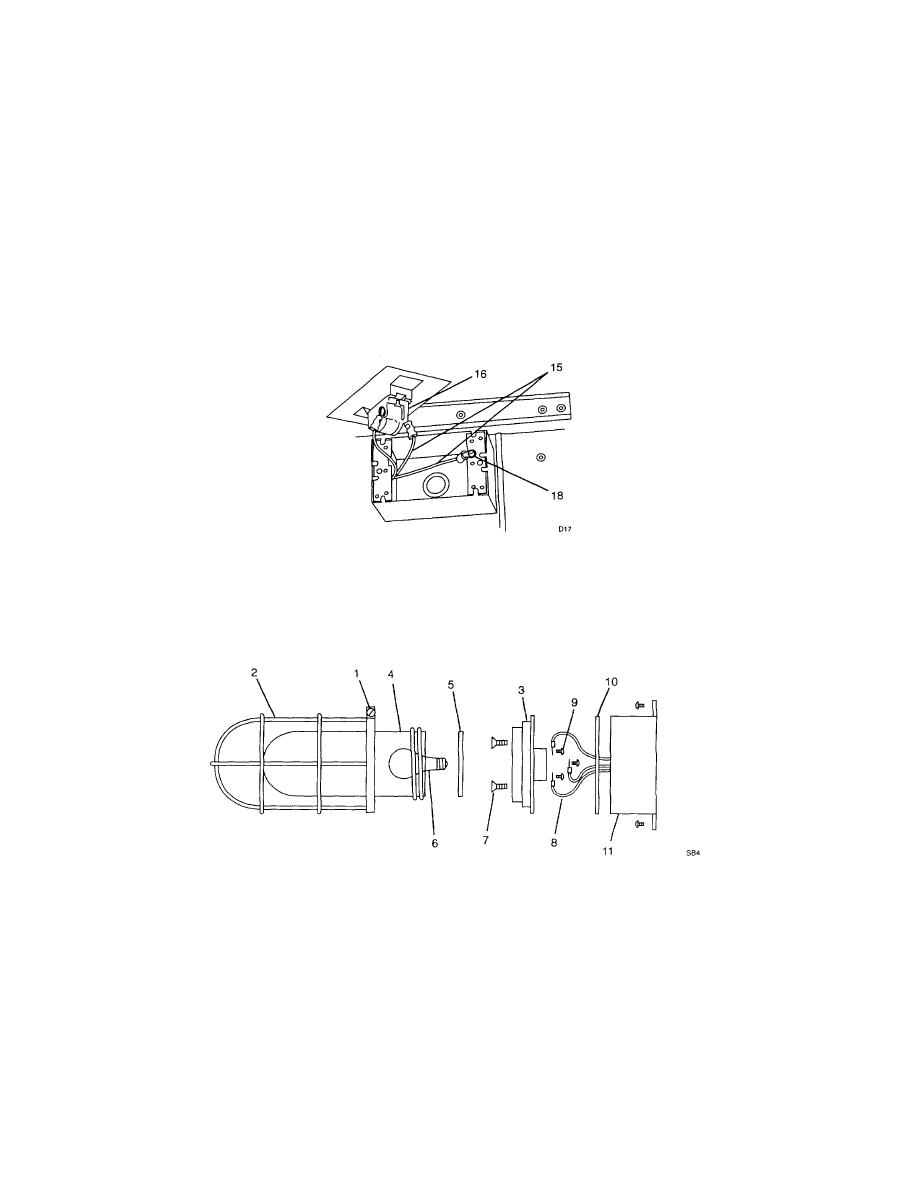
(8) Remove tag and reconnect ground wire (18).
(9) Reconnect wires (15) to switch (16).
(10) Reattach switch (16) to switch cover (13) using the two screws (17) removed during disassembly.
(11) Carefully repack the wires into the switch box and mount the switch cover (13) on the switch box (14)
using the two screws (12) removed during disassembly.
(12) Replace the gasket (10) on the junction box (11).
(13) Reattach the three wires (8) to the fixture base (3) using the three screws (9) which were removed
during disassembly.
(14) Reattach the fixture base (3) to the junction box (11) using the two screws (7) removed during
disassembly.
g.
Installation.
(1) Install bulb (6) by screwing into fixture.
(2) Install gasket (5) and globe (4) on fixture (3).
(3) Install guard (2) on fixture (3) and tighten using screw (1)
4-25

