TM 5-3810-306-34
e. Reinstall valves in their corresponding bores.
ASSEMBLY:
The valve seat should seat in the center of the
valve face.
1. IF REMOVED, INSTALL NEW VALVE GUIDES (11).
f.
Measure the valve seat width indicated by the
a. Fabricate two spacers (Items 12 and 13,
lapped surface. Minimum seat width .060 in.
(1.5 mm). Maximum seat width .080 in. (2.0
new valve guides (11).
mm).
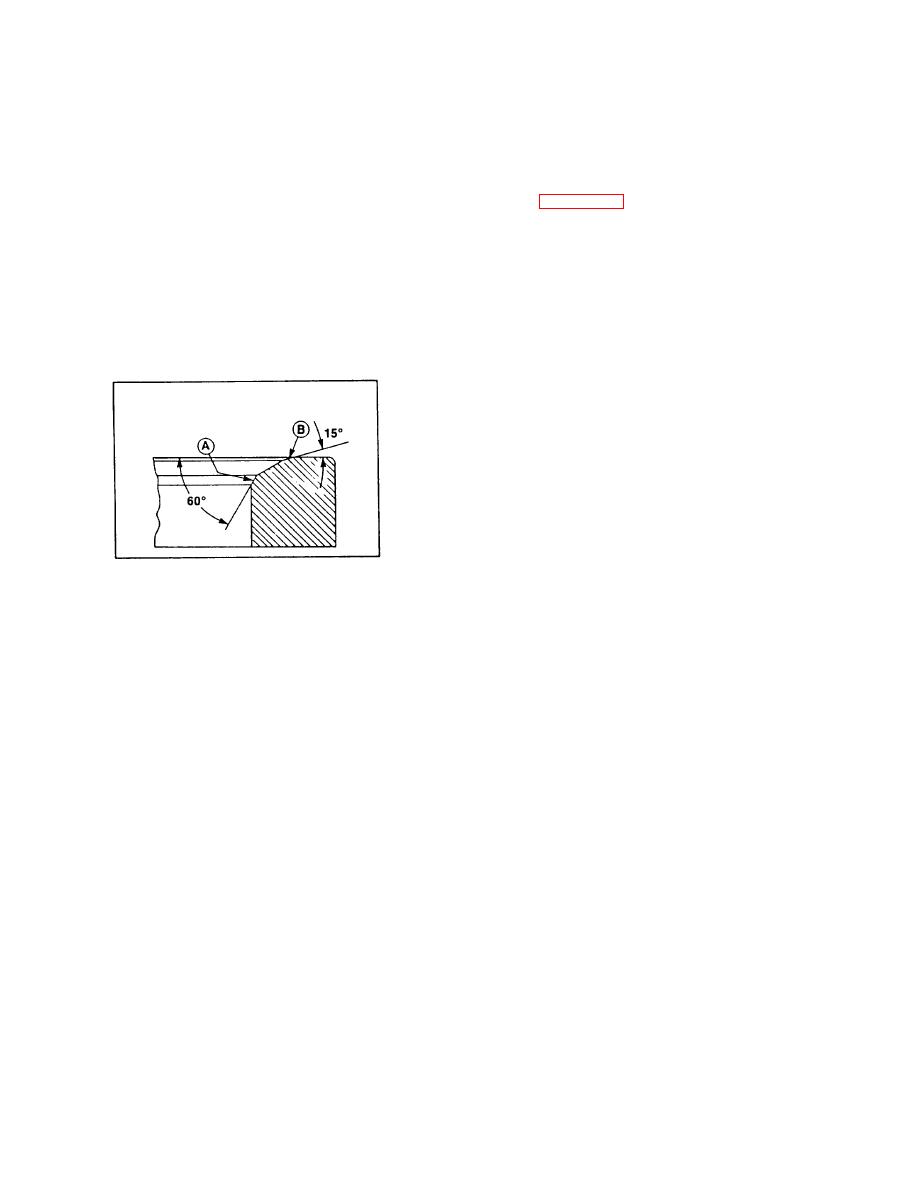
g. If valve seat width limits are not met or the seat
NOTE
is not centered, grind area (A) with a 60 degree
stone and area (B) with a 15 degree stone to
Valve guide depth is very important
center the seat on the valve face and obtain the
and care should be taken to machine
valve seat width limits.
spacers to correct dimensions.
b. Using universal valve guide driver, start guides
(11) into head. Make sure guides start straight.
c.
Install the proper spacer over guide. If required,
install a flat washer on driver o contact spacer.
d. Drive guide (11) in, until driver contacts spacer.
e. Using a .3750 in. (9.525 mm) reamer, ream
valve guides (11) with no lubricant and in one
direction only.
NOTE
h. After reaching limits above, coat each valve face
with "Dykem Steel Blue" and allow to dry.
Damage to valve guide can result
from pulling reamer back through
i.
Apply a coat of valve lapping compound to each
guide.
valve and lap the valve to its corresponding seat.
f.
Lubricate reamer with clean engine oil and run
j.
Remove valves and clean compound from valve
through a second time in one direction only.
faces and seats.
NOTE
Keep valves in a labeled rack to
prevent mixing.
4-14


