
TM 55-8145-202-14
4-21.
LIGHT ASSEMBLY - Continued
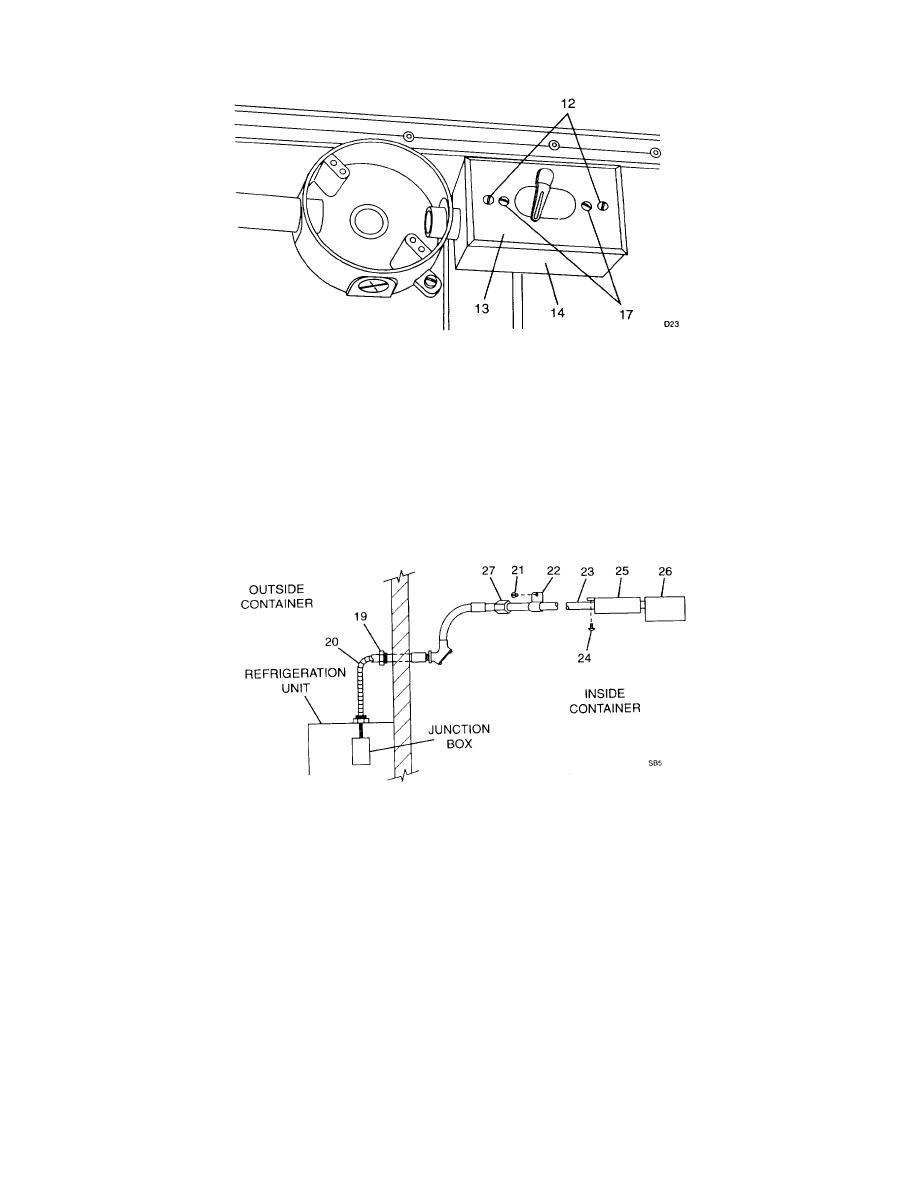
(7) Tag and disconnect wire (18).
(8) If necessary, loosen fitting (19) at outside, front of container and pull wiring (20) as far as needed.
(9) Remove five screws (21) and clamps (22) securing conduit (23).
(10) Remove two screws (24) from fixture base (25). Lower assembled components from container wall.
(11) Unscrew switch box (26) from base (25).
(12) Unscrew base (25) from conduit (23).
(13) Unscrew conduit (23) from coupling(s) (27) as required.
c.
Cleaning. Remove dirt from all components using clean wiping rag.
d.
Inspection.
(1) Inspect globe (4) for cracked or broken glass.
(2) Inspect switch (16) for sign of overheating, shorting, and corrosion.
(3) Inspect wiring (20) for cut, burned, or deteriorated insulation.
(4) Inspect conduit (23) for corrosion.
e.
Repair. Replace defective components.
(1) Install new switch (16) and secure with two screws (17) on switch cover (13).
4-24
