TM 5-3810-306-34
b. Remove four capscrews (12) from mounting
NOTE
flange (13). These motors are assembled using
Loctite on screws (12) to hold them in place.
The dust seal (14), pressure
Screws (12) will require approximately 300 to
seal (15) and seal (16) will
400 in-lbs (33-44 Nm) of torque to break loose
come off with flange (11).
and approximately 100 in-lbs (11 Nm) of torque
to remove after they are broken loose. Do not
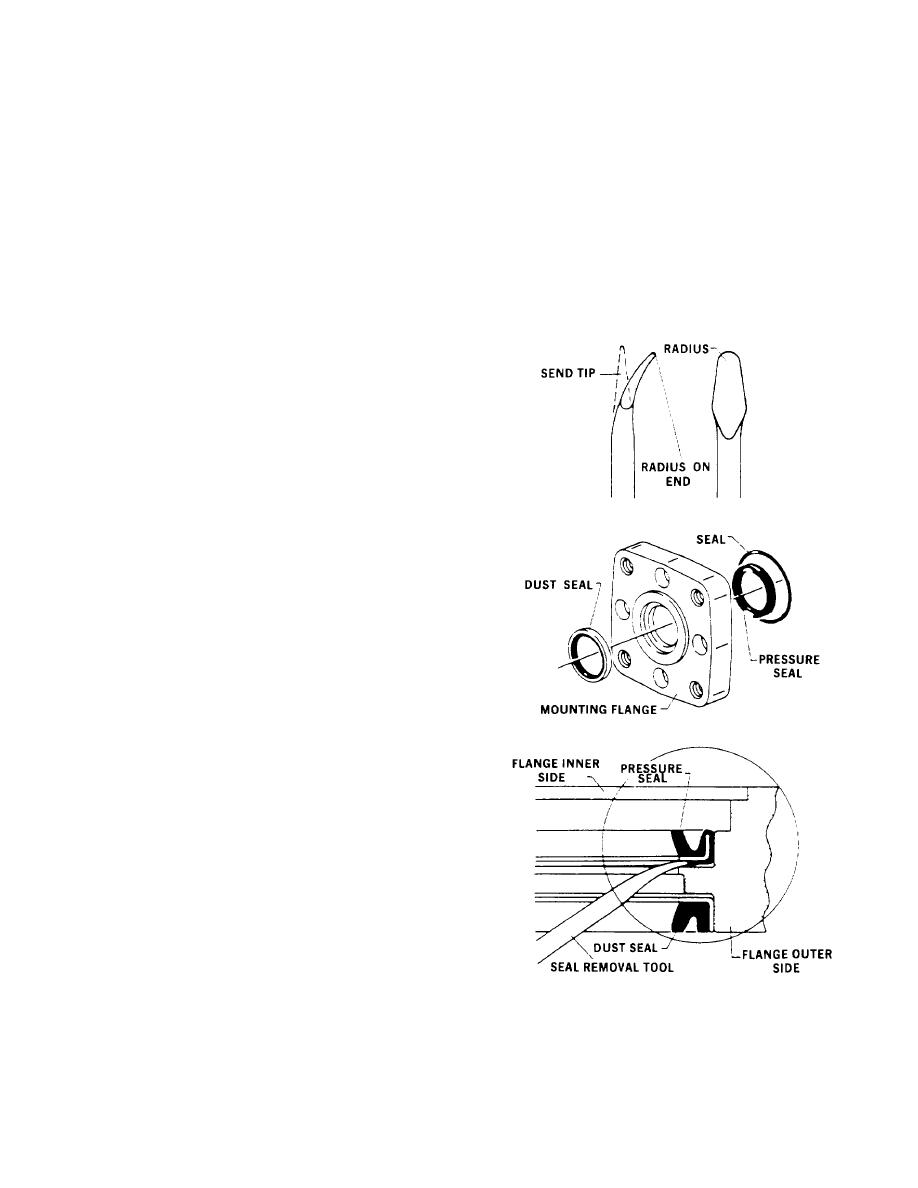
e. Use a seal remover tool, like the one shown to
use an impact wrench on screws held with
remove dust seal (14) and pressure seal (15).
Loctite, this may result in rounded heads or
Work from outer side to remove each seal.
broken sockets. If it requires more than 400 in
Work nose of tool between pressure seal (15)
lbs (44 Nm) to remove capscrews (12) proceed
and the flange (13). Pry seal partway. Remove
to step c otherwise proceed to step d.
tool and repeat at a point 180 degrees away.
Push seal (15) completely out of cavity.
CAUTION
Be careful not to overheat and
damage the motor.
c. Use a small flame propane torch to heat a small
area of housing (11) where the screw (12)
enters. Apply torque to capscrew (12) with a
socket wrench gradually as heat is applied for 8
to 10 seconds. As soon as screw breaks loose,
remove heat from housing, and continue turning
screw until it is completely removed.
d. Remove motor from vise and place it on a clean
flat surface. Carefully remove flange (13) from
the housing (11).
CAUTION
Use care not to scratch seal
cavity O.D. This could cause
leakage.
15-134


