TM 10-3930-675-24-2
BOOM SUPPORT LOCKING PIN CYLINDER AND LOCKING PIN REPLACEMENT - CONTINUED
0254 00
LOCKING PIN CYLINDER REMOVAL - CONTINUED
5.
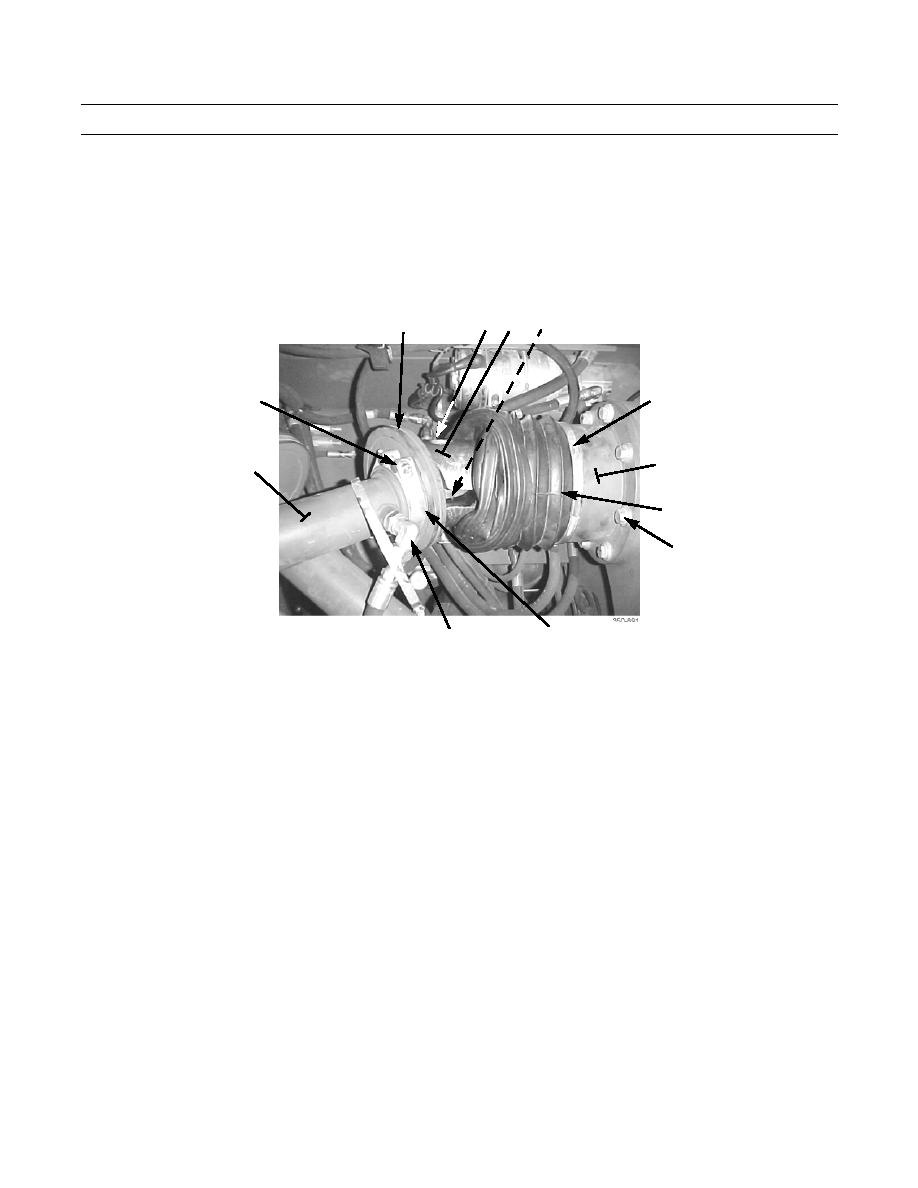
Pivot and rotate cylinder (4) to access retaining ring (10).
6.
Remove retaining ring (10) and pin (11). Discard retaining ring.
7.
Loosen clamp (12) and remove rubber bellows (5), retaining plate (7), two adapter fittings (13), check valve (14), two
O-rings (15), clamp (12), two bolts (16), nuts (17), and four washers (18) from cylinder (4). Retain for installation.
7
11
10 8
19
16,17,18
20
4
5
21
12
13,14,15
(HIDDEN)
LOCKING PIN REMOVAL
WARNING
Locking pin weighs 85 lb (39 kg). Care should be taken in handling to prevent injury to personnel.
1.
Loosen clamp (19) securing rubber bellows (5) to locking pin carrier assembly (20) and remove bellows.
2.
Slide locking pin (8) out of locking pin carrier assembly (20).
3.
Remove eight socket head screws (21) and locking pin carrier assembly (20).
LOCKING PIN INSTALLATION
WARNING
Locking pin weighs 85 lb (39 kg). Care should be taken in handling to prevent injury to personnel.
1.
Install locking pin carrier assembly (20) and eight socket head screws (21).
2.
Install locking pin (8) and slide into locking pin carrier assembly (20), leaving hole for cylinder pin exposed.
3.
Slide rubber bellows (5) into place and secure with clamp (19).
0254 00-3


