TM 9-3950-253-13&P
0090
INSTALLATION - Continued
NOTE
Perform steps 1 through 3 for both right and left sides.
Install shear latch as noted during removal.
1.
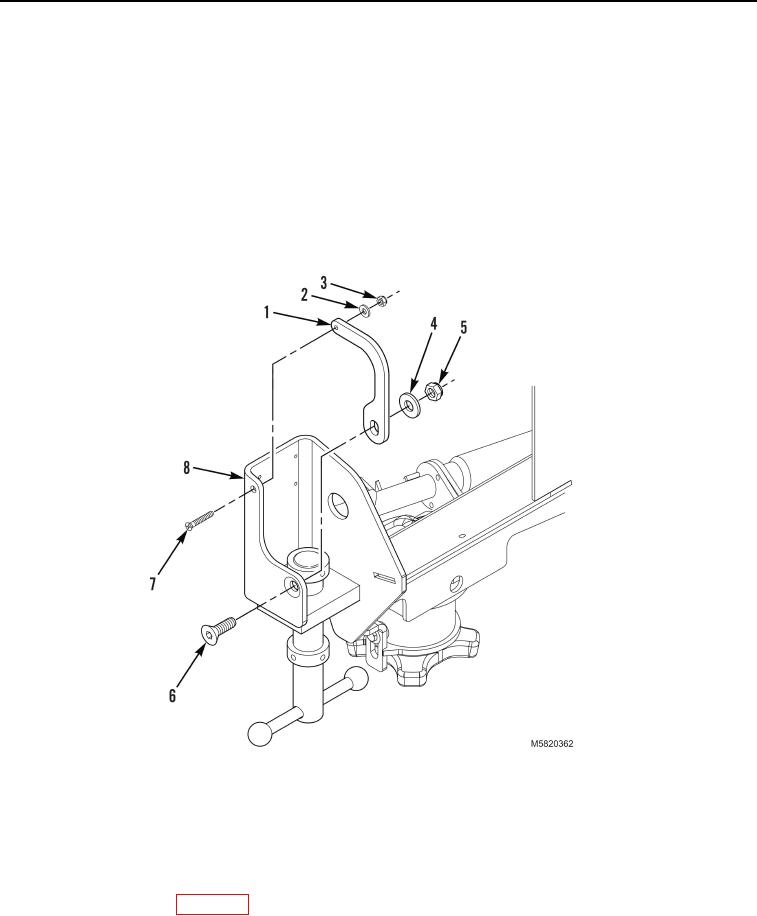
Loosely install shear latch (Figure 2, Item 1), bolt (Figure 2, Item 6), washer (Figure 2, Item 4) and new
locknut (Figure 2, Item 5), on stowage assembly (Figure 2, Item 8).
2.
Install shear latch (Figure 2, Item 1), bolt (Figure 2, Item 7), washer (Figure 2, Item 2) and new locknut
(Figure 2, Item 3) on stowage assembly (Figure 2, Item 8).
3.
Tighten bolt (Figure 2, Item 6) and locknut (Figure 2, Item 5).
Figure 2. Shear Latch.
END OF TASK
FOLLOW-ON MAINTENANCE
Stow lift frame on vehicle (WP 0007).
END OF TASK
END OF WORK PACKAGE
03/15/2011Rel(1.10)root(maintwp)wpno(M582089)

