
TM 9-3950-253-13&P
0091
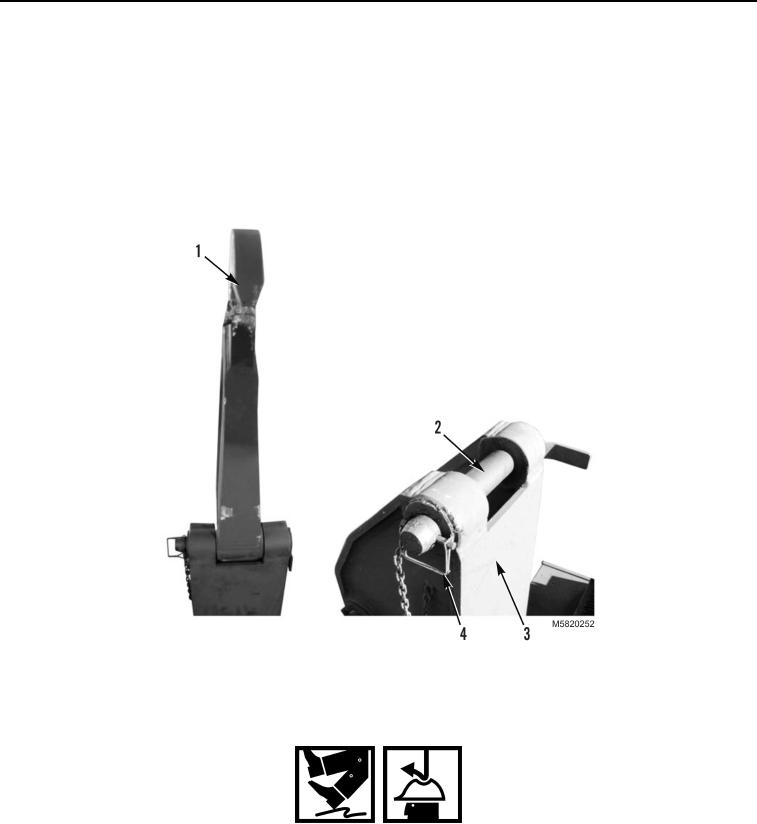
PREPARATION - Continued
3.
Remove locking pin (Figure 1, Item 4), and hook arm pin (Figure 1, Item 2) from hook arm base (Figure 1,
Item 3).
4.
Use lifting device to lower hook arm (Figure 1, Item 1) to middle frame.
5.
Remove lifting device and sling from hook arm.
6.
Install hook arm pin (Figure 1, Item 2), and locking pin (Figure 1, Item 4) in hook arm base (Figure 1,
Item 3).
Figure 1. Lower Hook Arm.
WARNING
During these procedures, the operator will be required to climb on and around the vehicle.
Be sure to wear suitable footwear, ensure no surfaces are slippery, wear suitable gloves
and hard hat and maintain three points of contact to the vehicle. Failure to follow this
warning may result in injury or death to personnel. Seek medical attention in the event of
an injury.
7.
Remove snap pin (Figure 2, Item 2) from locking pin (Figure 2, Item 3).
8.
Remove locking pin (Figure 2, Item 3) and bail bar lock (Figure 2, Item 4) from lift frame (Figure 2, Item 1).
03/15/2011Rel(1.10)root(maintwp)wpno(M582090)