
TM 10-3930-675-24-2
TOPHANDLER WIRING HARNESSES REPLACEMENT - CONTINUED
0221 00
WIRING HARNESS A, TOPHANDLER JUNCTION BOX-TO-JUNCTION BOX 182: REMOVAL - CONTINUED
NOTE
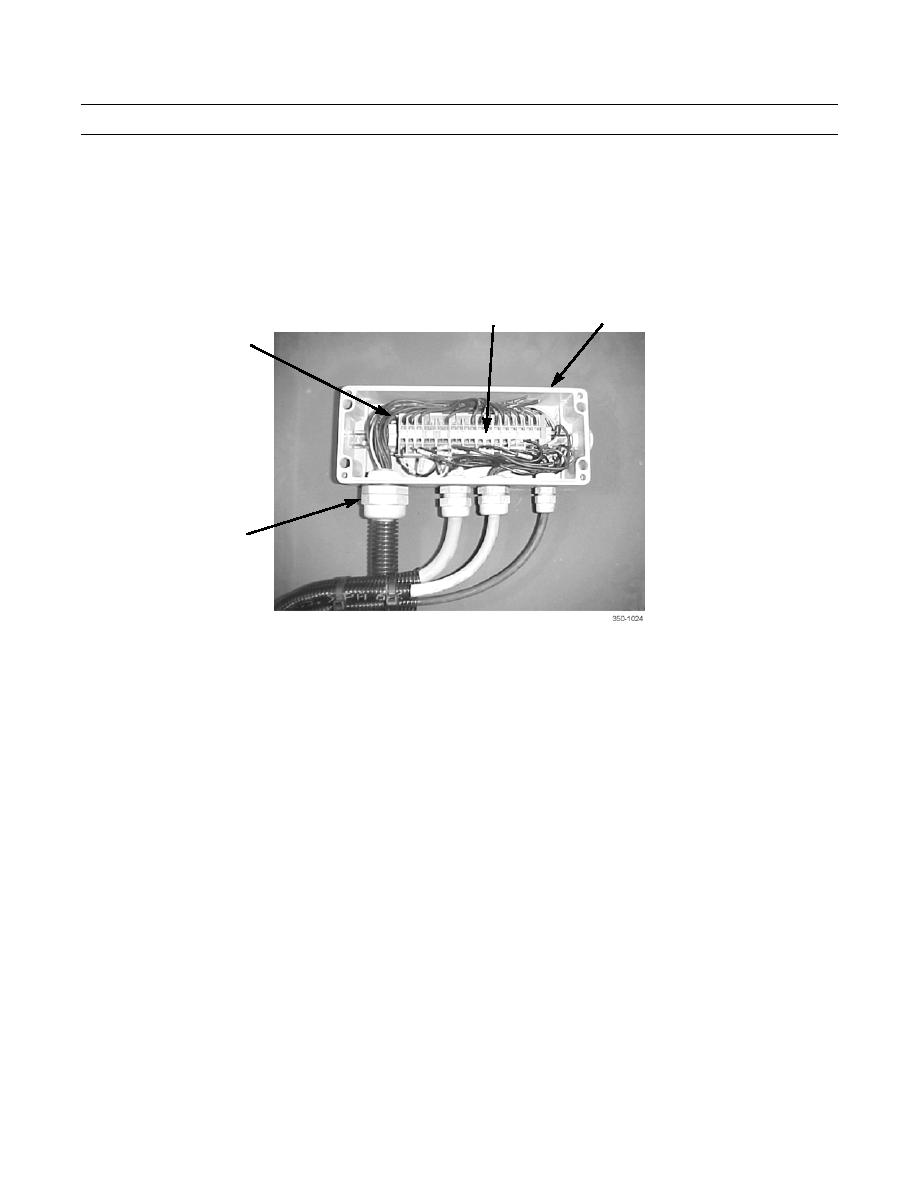
Use wiring diagrams in WP 0048 00, as needed, and note terminal block numbers to wire lead num-
bers for installation.
5.
Using jeweler's screwdriver, disconnect wiring harness A (2) leads from junction box 182 (6) terminal block (8).
6.
Remove retainer nut (9), grommet (10), sleeve (11), and wiring harness A (2) from junction box 182 (6). Retain retainer
nut, grommet, and sleeve for installation.
8
6
2
9,10,11
7.
From tophandler junction box end, with assistance, pull wiring harness A (2) from routing until wiring harness A is
approximately 18 in. (46 cm) from tophandler carriage frame above control valve.
NOTE
Nonelectrical wire is secured to wiring harness to be used as a guide wire during installation of new
harness.
8.
Secure approximately 6 ft (183 cm) of nonelectrical wire to wiring harness A (2).
9.
With assistance, continue to pull wiring harness A (2) and nonelectrical wire through cable routing until wiring harness
is free of tophandler carriage frame.
10.
Remove wiring harness A (2) from nonelectrical wire leaving nonelectrical wire in place through wiring harness rout-
ing.
WIRING HARNESS A, TOPHANDLER JUNCTION BOX-TO-JUNCTION BOX 182: INSTALLATION
CAUTION
Ensure sufficient length of wiring harness is coiled within tophandler opening, so that tophandler can
rotate freely in both directions without damaging harness.
1.
Attach junction box 182 (6) end of wiring harness A (2) to nonelectrical wire at tophandler junction box (1) end.
2.
With assistance, pull other end of nonelectrical wire and wiring harness A (2) through tophandler carriage frame until
approximately 18 in. (46 cm) of wiring harness A is exposed.
3.
Remove nonelectrical wire from wiring harness A (2) and continue to route wiring harness A to junction box 182 (6).
4.
Install wiring harness A (2) through retainer nut (9), grommet (10), sleeve (11), and use a jeweler's screwdriver to con-
nect leads to terminal block (8) as noted during removal. Tighten retainer nut.
0221 00-3
