
TM 9-3950-253-13&P
0076
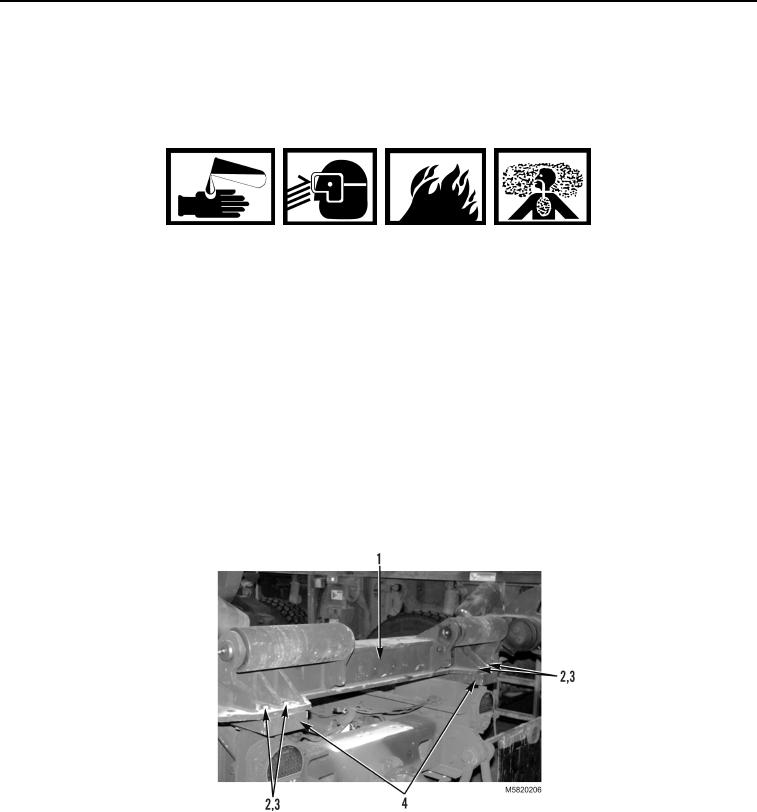
INSTALLATION - Continued
3.
Use lifting device to place rear slider assembly (Figure 14, Item 1) on mounting blocks (Figure 14, Item 4),
aligning holes in rear slider assembly with front holes in mounting block.
WARNING
Use caution when using adhesives and sealants. Prolonged inhalation of vapors can cause
lung irritation. Contact with skin can cause dermatitis. Wear gloves and safety goggles and
use product in a well-ventilated area away from open flame. If ingested, keep individual
calm and seek medical attention. DO NOT induce vomiting. If contact with skin or eyes is
made, flush thoroughly with water. Dispose of cleanup rags IAW local policy and
ordinances. When not using adhesive and sealants, ensure container is securely sealed.
Immediately clean up any spilled compound. Failure to follow this warning may cause
injury to personnel. Seek medical attention in the event of an injury.
NOTE
Perform steps 4 through 6 for both right and left sides.
4.
Apply thread adhesive to four bolts.
5.
Install four washers (Figure 14, Item 2) and bolts (Figure 14, Item 3) in rear slider assembly (Figure 14,
Item 1).
6.
Remove lifting device and sling from rear slider assembly.
Figure 14. Rear Slider Assembly.
Twistlock Sensor Installation
NOTE
Perform the following step for both right and left sides.
Install twistlock sensor (Figure 15, Item 2) in clamp (Figure 15, Item 1) and tighten two bolts (Figure 15, Item 3).
03/15/2011Rel(1.10)root(maintwp)wpno(M582075)